
Image to SVG Converter: Vectorize PNG and JPG
Turn pixel logos, icons and drawings into crisp, scalable vector graphics with a live before and after comparison.
- Runs in your browser
- No upload, no account
- Free and unlimited
- 6 tracing presets
- Before/after compare
Turn any image to SVG in your browser with this free vectorizer. Drop a PNG or JPG logo, icon, sketch or illustration, pick a preset such as Logo, Detailed or Black and white, set the number of colours, and trace it into a scalable SVG. Compare the result with the original, then download the file or copy the SVG code. Nothing is uploaded.
How to convert an image to SVG
1. Add an image
Drop a PNG, JPG or WebP, browse, or paste with Ctrl+V.
2. Pick a preset
Logo, Detailed, Smooth, Posterized, Black & white or Grayscale.
3. Tune
Set the colour count, detail size or line-art threshold.
4. Download
Compare before and after, then save or copy the SVG.
What this free tool does
Six presets
Tuned for logos, line art, illustrations and posters.
Colour control
From 2 to 64 colours for clean, compact output.
Line-art mode
Threshold to pure black and white for sketches.
Background removal
Drop the background colour for transparent vectors.
Before/after slider
Compare the trace with the original pixels.
Private
Tracing runs on your device, nothing is uploaded.
Who uses it
Logos
Rescue a logo that only exists as a small PNG.
Cutting machines
Prepare shapes for Cricut, laser and vinyl cutters.
Icons
Make scalable icons for websites and apps.
Print
Enlarge simple artwork without blur.
Free vs Pro: what you pay for
Free · this tool
Image to SVG Converter
- Unlimited conversions
- Runs in your browser, no upload
- Presets, colour count and background removal
- No account, no watermark, no credits used
Pro credits · Pro AI tools
Enhance, upscale, restore
- Credits are only for Pro AI processing
- 5 free Pro credits every week with an account
- Charged only when a job succeeds
- Format tools like this one stay free
Pixels and paths
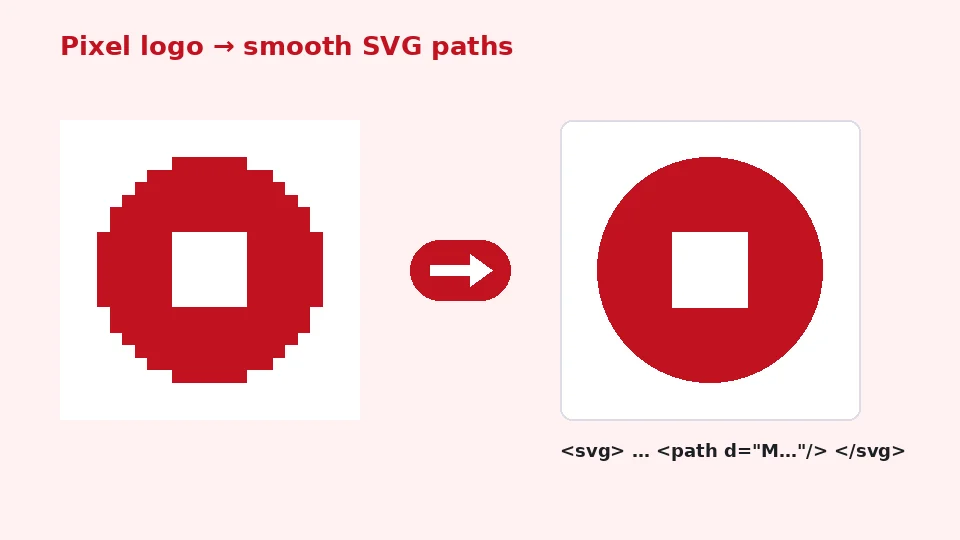
Photos and most images on the web are raster graphics: grids of coloured pixels. When you enlarge them, the pixels grow and edges turn jagged or blurry. Vector graphics such as SVG describe shapes with mathematical paths and fills instead, so they stay perfectly sharp at any size, from a favicon to a billboard.
Converting a raster image into a vector is called tracing. The software finds areas of similar colour, follows their outlines and replaces them with smooth curves. It works best with images made of flat colours and clear edges.
Which to use when
Comparing raster vs vector in one sentence: raster is best for photographs with endless subtle detail, while vector is best for logos, icons, text and illustrations with defined shapes. A traced photo can look artistic, but it will never be as faithful as the original pixels.
How to convert image to SVG here
Add a picture by dragging it onto the box, browsing, or pasting from the clipboard. Choose a preset, adjust the colour count if needed, and press Convert to SVG. The tracer reduces the image to the chosen number of colours, finds the outline of each colour area and writes them as SVG paths. A slider then lets you compare the original and the vector side by side.
Below the comparison you see the number of paths, the SVG file size and how long the trace took. Download the file, or copy the code to paste directly into HTML or a design tool.
Logos
PNG to SVG is the most common job, because logos are often only available as PNG files. Use the Logo preset with as many colours as the logo really has, usually two to eight. Tick Remove background colour if the logo sits on a plain background and you want a transparent vector.
Choosing the right preset
Sketches and line art
For line art to vector conversion, such as sketches, signatures, stamps and scanned drawings, choose Black & white. Move the threshold until thin lines are complete but the paper texture disappears. The result is a clean two-colour SVG that is ideal for cutting machines and engraving.
Detailed and smooth
Detailed keeps small features and fine curves, which suits illustrations and complex badges, but produces larger files. Smooth softens noise before tracing and gives flowing shapes, which suits hand-drawn illustrations and scanned artwork with grain.
Posterized and grayscale
Posterized reduces the image to a few bold colour areas for a graphic, screen-print look. Grayscale removes colour first, which is useful for single-colour printing and for tracing photos into an artistic, monochrome vector.
Getting clean results
Start with the largest and sharpest version of the image you have. Compression artefacts and blur become extra shapes in the trace. If your source is small or soft, our AI image upscaler can enlarge and sharpen it first, and the cleaner input gives a much better vector.
Use the fewest colours that still look right. Every extra colour adds paths and file size. For a two-colour logo, set two or three colours; for a flat illustration, eight to sixteen is usually enough. The Detail setting controls the working size: 1000 pixels is a good balance, and 2000 pixels captures more detail at the cost of speed.
Compressed photos
JPG to SVG works the same way, but JPEG compression adds noise around edges. The Smooth preset or a slightly lower colour count hides that noise and gives cleaner shapes.
Using your SVG
SVG files open in Illustrator, Inkscape, Figma, Affinity Designer, Canva and most cutting-machine software. In a website, you can use the file in an img tag or paste the code directly into your HTML, where it can be styled with CSS. For favicons and app icons, our favicon generator accepts SVG input and creates every size you need.
If you need a pixel version again, for example for a social profile, our SVG to PNG converter renders the vector at any size, with or without transparency.
Cutting machines
For SVG for Cricut and other cutting machines, use Black & white or Logo with few colours, and remove the background. Fewer, larger shapes cut more cleanly than many tiny ones, so lower the detail size if the trace contains lots of specks.
Privacy, limits and honesty
Tracing runs entirely in your browser, so unpublished logos and client artwork never leave your device. Large, detailed photos can take several seconds and produce big files; the tool warns you when the SVG exceeds 1 MB.
Automatic tracing is not the same as hand-drawn vector work. For a brand logo that needs perfect geometry, use the trace as a starting point and refine it in a vector editor. The tool is free, unlimited, adds no watermark and does not use EnhancerPro credits.
Common questions about vectorizing
Why does my SVG have so many shapes?
Noise, gradients and shading create many small areas of slightly different colour. Lower the colour count, choose the Smooth or Posterized preset, or reduce the detail size. Removing the background also cuts the number of paths noticeably.
Can I trace text?
Yes, text in a logo traces into shapes, but it will no longer be editable text. If you know the font, retyping the text in a vector editor gives the cleanest result.
Will colours match exactly?
The tracer picks representative colours from the image, so they can differ very slightly from your brand codes. Use our colour picker to read the exact codes from the original and adjust the fills in a vector editor if precision matters.
Examples of what to trace
An old logo from a website
Many small businesses only have their logo as a small image downloaded from an old website. Upscale it first if it is tiny, then trace it with the Logo preset and the real number of colours. The resulting SVG can be printed on signs, shirts and vehicles at any size, which was impossible with the original pixels.
A hand-drawn sketch
Draw with a dark pen on white paper, photograph it in daylight and crop it tightly. Black & white mode with a carefully set threshold turns the drawing into clean shapes you can colour in a vector editor, use for stickers, or cut with a vinyl plotter.
Icons for an app or website
Simple icons trace very well. Keep the colour count low, remove the background and paste the code directly into your page. Because the SVG scales without blur, the same file looks sharp on every screen density.
Signatures and stamps
Scanned signatures and rubber stamps become small, transparent SVGs in Black & white mode. They can be placed on documents at any size and printed without the grey, blurry edges of a photographed original.
Posters from photos
For an artistic effect, trace a photo with the Posterized preset and four to six colours. The result is a bold, flat-colour illustration that suits posters and social graphics, and it scales cleanly for large prints. Try different colour counts until the subject is still recognisable but the shapes stay simple. Grayscale with a handful of tones gives a classic stencil look that prints well in a single ink on paper or fabric.
Once you are happy with a traced file, keep the original raster next to it. If a client later asks for a slightly different crop or colour, you can trace again in seconds instead of editing hundreds of tiny path points by hand. Naming both files clearly, for example logo-source.png and logo-traced.svg, keeps a small design folder easy to manage.
Frequently asked questions
Related tools
Need sharper, bigger or restored photos?
Our AI tools enhance, upscale and repair images for free on your device, with optional Pro AI processing on credits.