
Blur Image Online: Hide Faces, Plates and Text
Soften or pixelate the parts of a photo that should stay private, with a before/after check and no upload.
Drop image files here, or click to choose
JPG, PNG or WebP · up to 50 files · 50 MB each · Ctrl+V to paste · nothing is uploaded
- Runs in your browser
- No upload, no account
- Free and unlimited
- No watermark
- Batch + ZIP download
Blur image online for free, right in your browser. Drag rectangles or paint over faces, number plates, addresses and screens, or blur the whole picture for a soft background. Adjust the strength, switch to pixelate, and compare before and after with a slider. Your photos are processed on this device and never uploaded.
How to blur part of a picture in four steps
1. Add photos
Drop JPG, PNG or WebP files, browse, or paste with Ctrl+V.
2. Mark areas
Drag rectangles or paint over faces, plates or text.
3. Set the effect
Choose strength, or tick Pixelate for blocky censoring.
4. Compare and save
Check the before/after slider, then download.
What this free tool does
Drag or paint
Rectangles for plates and text, a brush for any shape.
Whole-image mode
Soften an entire picture or a batch at once.
Strength slider
From a gentle soften to heavy anonymising blur.
Pixelate option
Classic mosaic blocks for clear censoring.
Before/after slider
Check every result before you download.
Private
Processing happens on your device; nothing is uploaded.
Who uses it
Street photos
Hide passers-by and children before posting.
Cars for sale
Cover the number plate in listing photos.
Screenshots
Mask names, emails and account numbers.
Documents
Hide addresses or ID numbers on scans.
Free vs Pro: what you pay for
Free · this tool
Blur Image Online
- Unlimited conversions
- Runs in your browser, no upload
- Batch up to 50 files and ZIP download
- No account, no watermark, no credits used
Pro credits · AI cloud tools
Enhance, upscale, restore
- Credits are only for AI cloud processing
- 5 free cloud credits every week with an account
- Charged only when a job succeeds
- Format tools like this one stay free
Why blur part of a photo?
Photos often contain details that are not meant for everyone: the face of a stranger, a child at a school event, the number plate of a car, a house number, or a screen showing private messages. Blurring those areas lets you share the picture while respecting other people's privacy and protecting your own.
Businesses do the same before publishing customer photos, estate agents hide personal items in listings, and support teams mask account details in screenshots.
Two styles of hiding
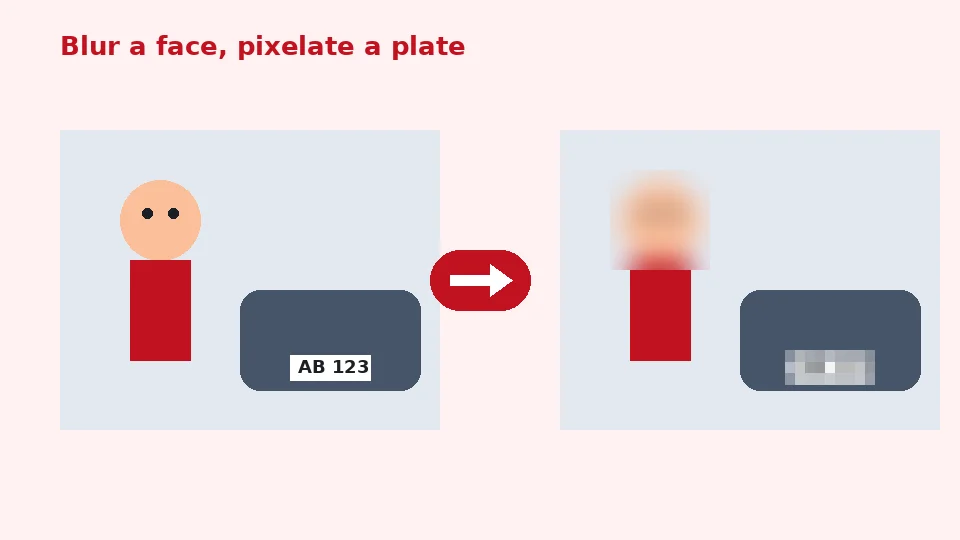
When choosing between blur or pixelate, think about the look you want. Blur creates a smooth, soft area that blends into the photo. Pixelation turns the area into large blocks, which reads clearly as censored. At strong settings both hide details well; pixelation is the traditional choice for faces and plates in news images.
How to blur image online with this tool
Add your photos, keep Selected areas, and choose a tool. With Drag rectangle, press and drag over the area to hide. With Paint brush, paint over irregular shapes such as hair or a sign at an angle; the brush size slider sets how wide each stroke is. Every marked area is shown in red. Undo removes the last one and Clear starts again.
Press Apply blur and the tool processes each photo. A before/after slider then shows the selected image so you can confirm everything sensitive is hidden. Choose Edit areas again to change anything.
Faces
To blur faces in photos, drag a rectangle slightly larger than each head, including hair and ears, since these can also identify someone. Use a high strength or Pixelate so that features cannot be recognised.
Number plates
To blur a license plate, drag a rectangle over the plate with a little margin. Pixelate at medium to high strength gives a clean, obviously censored look that buyers expect in car listings.
Blur the whole image
Switch Blur to Whole image to soften an entire picture. This is useful for backgrounds behind text on slides, privacy-safe placeholders, or teaser images. Whole-image blur applies to every file in the batch, so you can blur many photos in one go and download them as a ZIP.
For a blurred background with a sharp subject, the AI tools in EnhancerPro can cut out the subject first; this free tool blurs whatever you select.
Getting the strength right
How much blur is enough?
Light blur can sometimes be partly reversed or read from context, so for faces, plates and text use a strength of 60 or more, or Pixelate. The effect scales with the image size, which means the same setting gives a similar look on small and large photos.
Text and screenshots
To blur text in a screenshot, drag a rectangle over each line and use Pixelate or high strength. For the strongest protection with numbers and passwords, crop the area out completely or cover it, since very short text can sometimes be guessed.
The rest stays sharp
Only the areas you mark change, so you can blur part of an image without losing quality elsewhere. PNG and WebP files keep transparency, and JPG photos are saved at high quality.
Devices and formats
On phones, the editor works with touch: drag a finger to draw rectangles or paint. To blur a photo on iPhone, open this page in Safari, choose a picture, mark areas, then save the result via the share sheet. Android works the same in Chrome, and computers work in any modern browser.
JPG, PNG and WebP files up to 50 MB are supported. The output keeps the original format and is saved upright, and camera metadata is not copied to the new file.
Batch work
Each photo keeps its own marked areas, so you can switch between files with Edit areas and mark each one before applying. Photos without marked areas are skipped and listed with a short note.
Privacy and good practice
Your images are processed in browser memory and never uploaded, logged or stored. Closing the tab removes them. Before sharing, it is worth also removing hidden location details with our EXIF remover, since blurring changes what is visible but metadata can still reveal where a photo was taken.
The tool is free, unlimited, adds no watermark and does not use EnhancerPro credits.
Practical examples
Group and event photos
When sharing photos from schools, clubs or public events, some people may not want to appear online. Mark only their faces and leave the rest of the group sharp. Taking a moment to do this before posting shows respect for everyone in the picture and avoids awkward requests to take a photo down later.
Property and rental listings
Listing photos can show family pictures on the walls, mail on a table or a car in the driveway. Painting over those details keeps the focus on the property while protecting the people who live there.
Bug reports and tutorials
Screenshots for support tickets and how-to guides often include names, email addresses, tokens or customer data. Drag a rectangle over each sensitive line and choose Pixelate. The rest of the screenshot stays crisp, so the steps remain easy to follow.
Creative soft focus
Blur is not only for privacy. A softly blurred copy of a photo makes an attractive background for quotes, slides and website banners, and text placed on top stays easy to read. Use Whole image with a medium strength for this effect, and keep the sharp original for other uses.
Checking your result
After applying, drag the before/after slider across each marked area and zoom in on your screen if needed. If any letters, numbers or facial features are still recognisable, raise the strength or switch to Pixelate and apply again. A few seconds of checking is worth it before an image is shared publicly, because once it is online it can be copied.
Choosing between rectangle and brush
Rectangles are fastest for anything with straight edges, such as plates, signs, screens, documents and lines of text. The brush is better for irregular shapes like a face turned to the side, a tattoo or a logo on clothing. You can mix both on the same photo: the tool remembers every area you mark until you clear it.
For small details, use a smaller brush and paint slowly. For large areas, increase the brush size so a few strokes cover everything. Undo removes the most recent rectangle or stroke if you go too far.
Working with many files
In Selected areas mode, every photo keeps its own marks. Click Edit areas next to a file to switch the editor to that image, mark what needs hiding, then move on to the next one. When all files are ready, a single click on Apply blur processes the whole list and the ZIP button collects the results.
Transparent images
PNG and WebP images with transparent backgrounds stay transparent after blurring. Only the marked areas change, so logos and cut-out product shots keep clean edges everywhere else. In Whole image mode the soft edge of the blur can extend slightly into transparent areas, which often gives a pleasant glow. If you prefer crisp outer edges, use Selected areas instead and mark only the inside of the subject.
Frequently asked questions
Related tools
Need sharper, bigger or restored photos?
Our AI tools enhance, upscale and repair images for free on your device, with optional cloud processing on Pro credits.